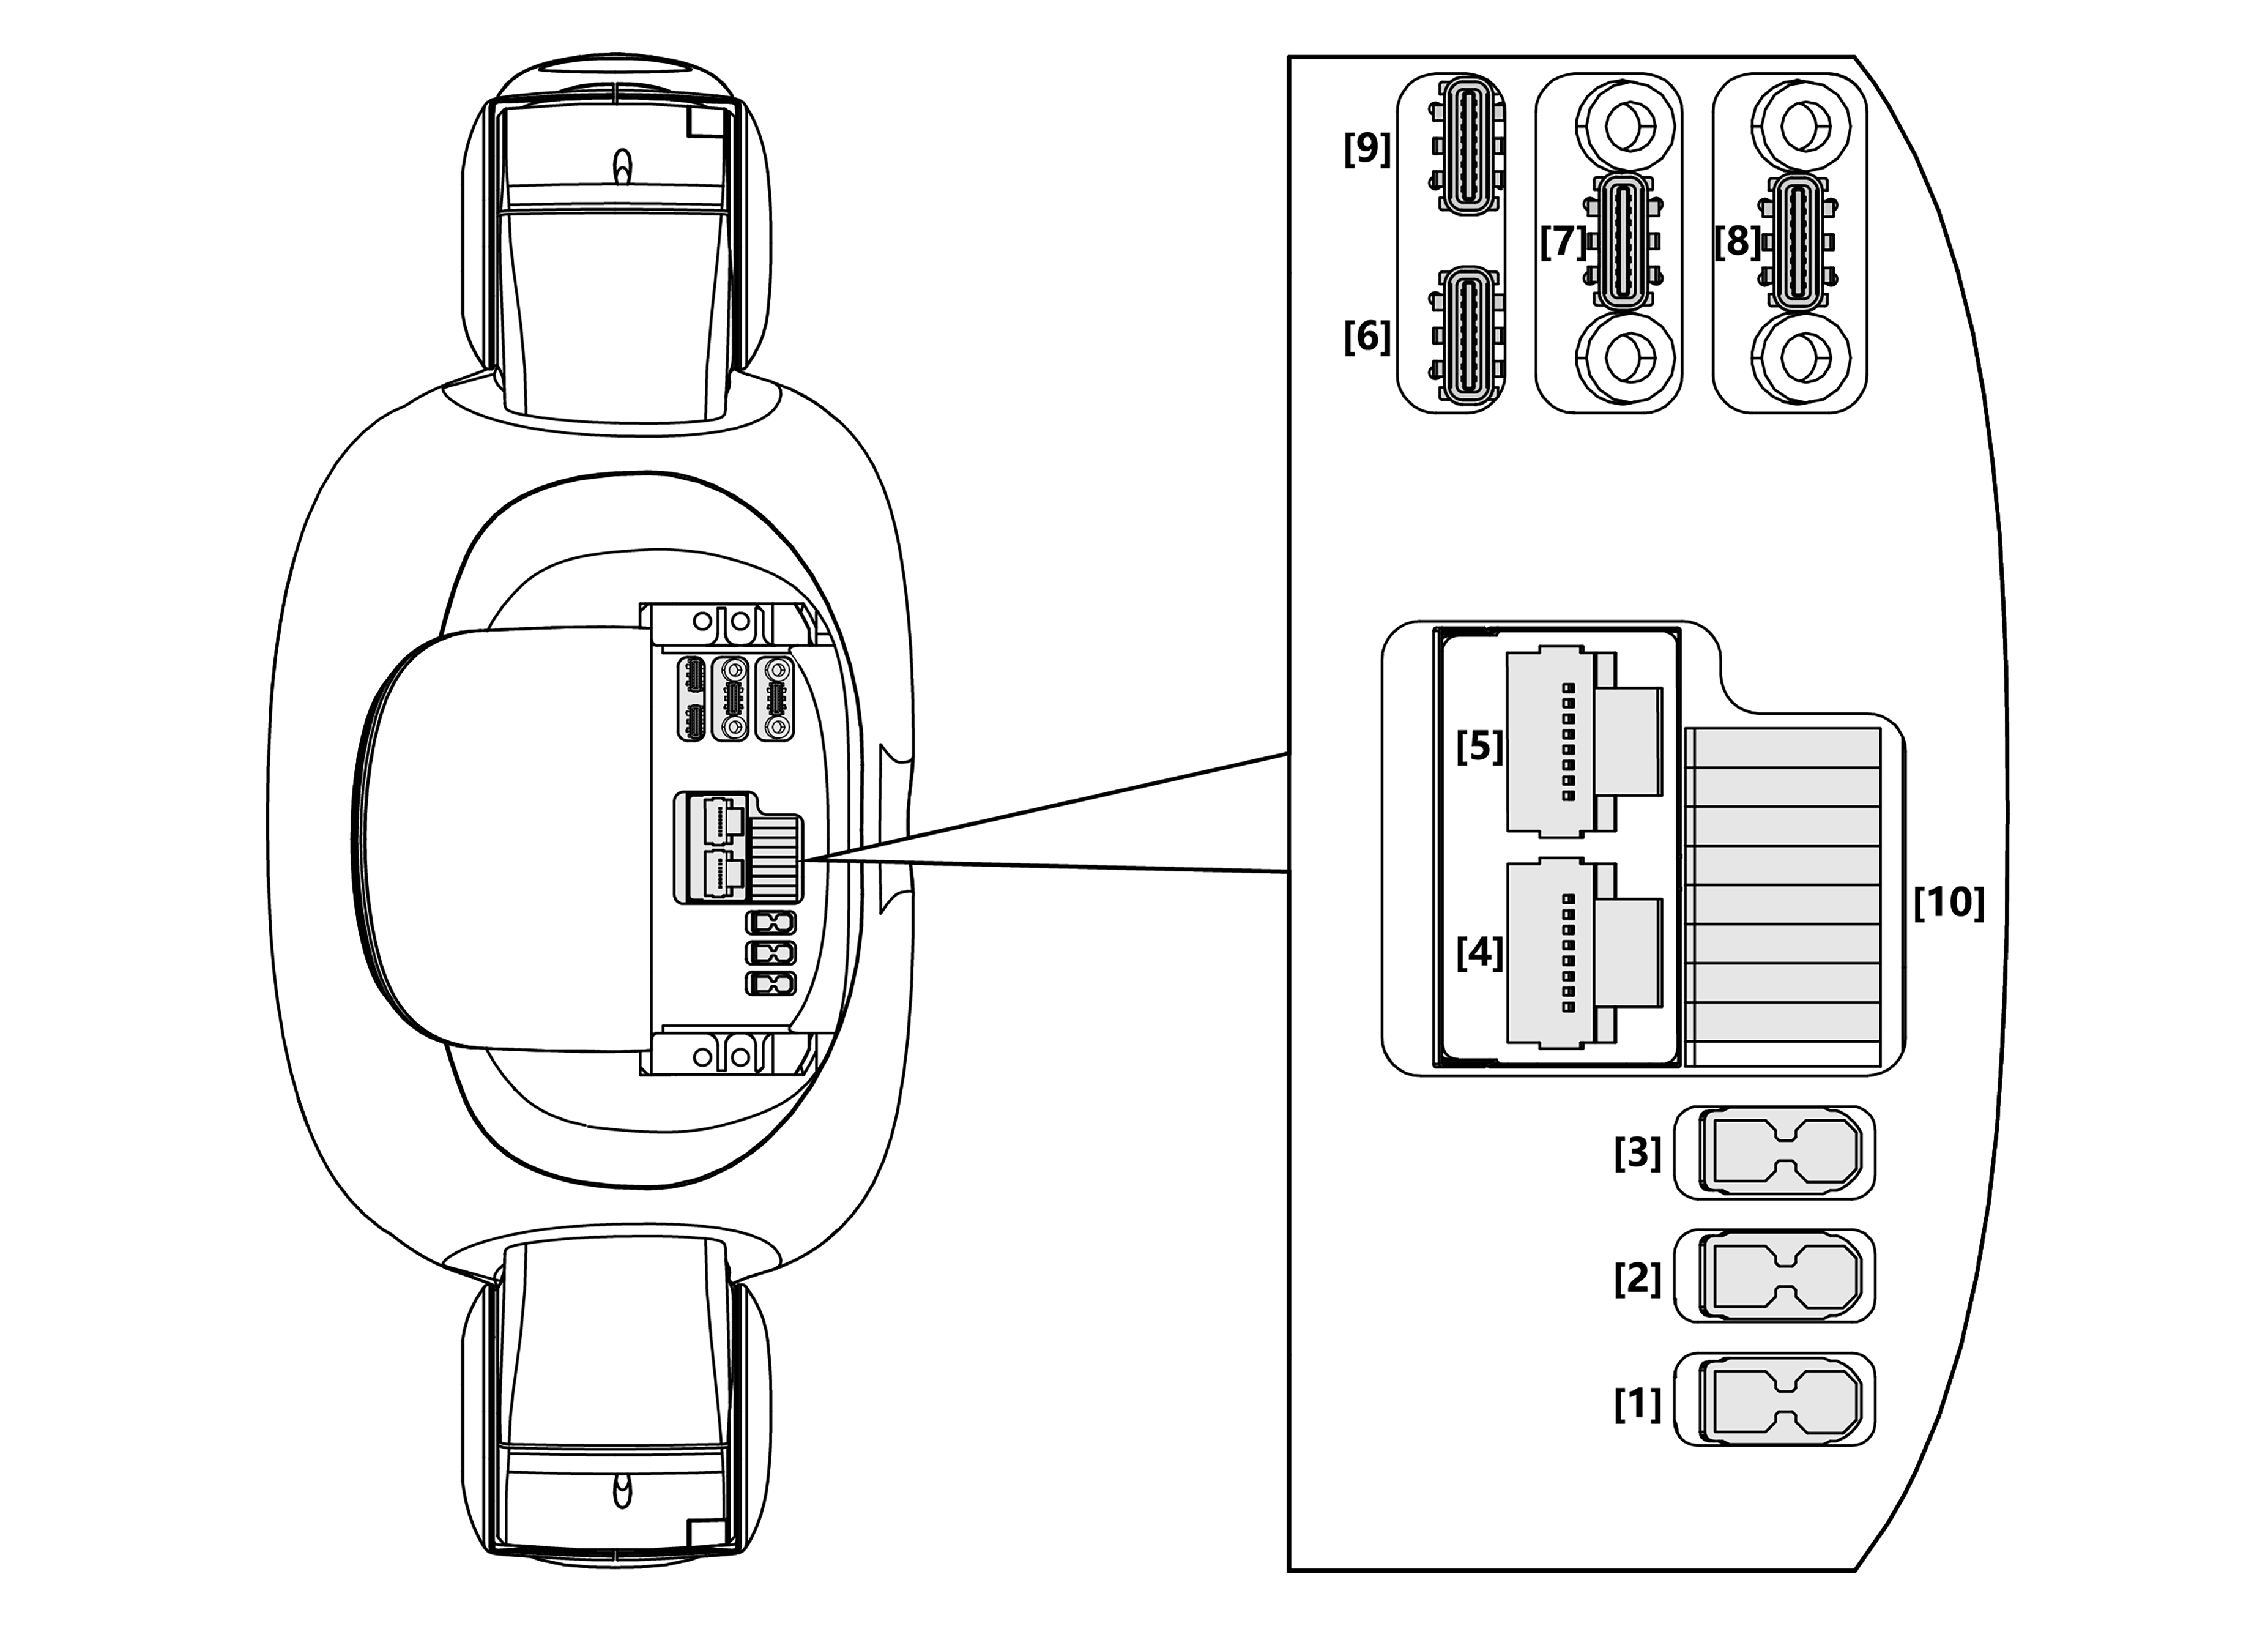
G1 Internet Access Guide
This guide details 2 methods to provide the internal development PC (192.168.123.164) internet access. The first method utilises the WiFi card onboard the internal development PC to connect to a WiFi Access Point with internet access. The second method configures a host computer to connect to the internal development PC using a static IP over Ethernet and share internet access from the host.
Method 1: Connect Internal Development PC to WiFi
-
Connect to the internal development PC via LAN using port 4 or 5 on the G1 electrical interface.

-
ssh into the internal development PC
ssh unitree@192.168.123.164
Password: 123
- Show Network Devices
lshw -C network
- Check Wi-Fi Block Status
sudo rfkill list
If Wi-Fi is blocked, unblock it:
sudo rfkill unblock wlan
- Enable WiFi
sudo nmcli radio wifi on
- Connect to a WiFi Network
sudo nmcli device wifi connect <SSID> password <password>
- Test
ping 8.8.8.8
Method 2: Network Sharing Between Host and Internal Development PC
Connect to the internal development PC via a USB-hub using port 9 on the G1 electrical interface.

Step 1: Configure Static IP on Robot (Internal Development PC)
Create a Netplan config file
sudo vim /etc/netplan/01-network-manager-all.yaml
Paste the following into the file:
network:
  version: 2
  renderer: NetworkManager
  ethernets:
    eth0:  # replace with the unassigned ethernet interface
      dhcp4: no
      addresses: [192.168.1.2/24]
      gateway4: 192.168.1.1   # This IP address corresponds to the host's static IP, to be created in step 2
      nameservers:
        addresses: [8.8.8.8, 8.8.4.4]
Note: The internal development PC has 2 ethernet interfaces (eth0 and eth1). One of the interfaces will already be assigned an IP of 192.168.123.164. Please do not configure this interface in the netplan config file, instead use the UNASSIGNED interface.
Test the Netplan configuration
sudo netplan try
Press the "Enter" key when prompted.
Verify the default gateway on the internal computer
ip route
The expected output:
default via 192.168.1.1 dev eth0 proto static metric 101
Step 2: Configure Static IP on Host (Your Computer)
Assign a static IP to your host’s Ethernet interface that is in the same subnet, e.g., 192.168.1.1.
The IP address must follow the gateway address set in the netplan config file in step 1.
sudo nmcli con modify <ethernet_interface_name> ipv4.addresses 192.168.1.1/24
sudo nmcli con modify <ethernet_interface_name> ipv4.method manual
sudo nmcli con up <ethernet_interface_name>
Step 3: Enable Internet Sharing on the Host
- Verify the internet-connected interface on host computer
ip route get 8.8.8.8
The expected output should be similar to:
8.8.8.8 via 192.168.29.1 dev wlp0s20f3 src 192.168.29.179 uid 1000
For this sample setup, we'll use the interfaces below. Please change the interfaces according to your host computer.
Ethernet to robot is: enx34298f73882f
Internet interface is the interface identified in step 3.1: wlp0s20f3 (WiFi) or enp0s31f6 (LAN)
- Enable IP Forwarding Check if enabled:
cat /proc/sys/net/ipv4/ip_forward
If it returns 0, enable it:
echo "1" > /proc/sys/net/ipv4/ip_forward
- Set Up NAT and Forwarding Rules
# Replace wlp0s20f3 with your actual internet interface
# Replace enx34298f73882f with your robot ethernet interface

sudo iptables --table nat --append POSTROUTING --out-interface wlp0s20f3 -j MASQUERADE
sudo iptables --append FORWARD --in-interface enx34298f73882f --out-interface wlp0s20f3 -j ACCEPT
sudo iptables --append FORWARD --in-interface wlp0s20f3 --out-interface enx34298f73882f -m state --state RELATED,ESTABLISHED -j ACCEPT
- Verify the NAT Rule Exists
sudo iptables -t nat -L -n -v
Look for a MASQUERADE rule under POSTROUTING.
Step 4: Test the Connection
On the robot (internal computer):
- Check IP address:
ifconfig
- Ping the host computer:
ping 192.168.1.1
- Try pinging a public IP:
ping 8.8.8.8

