Manifold Pocket2 Scanner
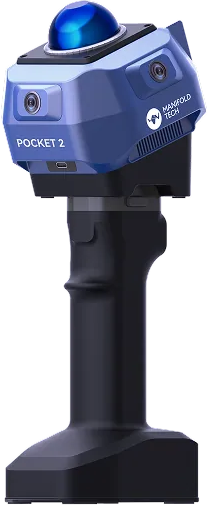
A handheld 3D capture unit built around a 40-channel LiDAR and three global-shutter RGB cameras. It records to its own internal SSD, and you start, preview and stop a scan from a phone or tablet joined to the scanner's own Wi-Fi.
It is the newer of the two Manifold scanners we supply, and it is used the same way as the earlier Pocket Scanner: carried rather than mounted, to capture a site before a robot is deployed into it. The point cloud it produces is what the Robot Deployment Toolbox authors a site map against.
Capture is previewed live and managed in the field through MindCloud Go; MindCloud Studio on a desktop — Windows, or Linux as an AppImage — does the heavier processing and the format conversion.
This page does not repeat or replace Manifold Tech's documentation. It highlights the information you reach for most often, and supplements it with what we have learned from supplying and supporting these units — configuration, verified values, and our own guides.
Manifold Tech's own documentation:
Getting started
Before you travel to a site:
- Charge it. A full 4000 mAh handle battery is up to 2 hours of capture. Use a 35–67 W USB-C charger, ideally 12–16 V input.
- Install MindCloud Go on the phone or tablet you will carry, and MindCloud Studio on the machine that will do the processing. Both are in Related resources.
- Plan the session around the battery. Two hours is the practical unit, so a site needing longer has to be split — decide where the seams fall before you start rather than after the battery goes.
- Check the storage on your unit. The scanner records to an internal SSD, in 256 GB, 512 GB or 1 TB. Know which one you have before planning a long session.
- Check what you are scanning. Effective range depends heavily on surface reflectivity; see the note under Specifications.
The capture and processing sequence itself is covered end to end in Manifold Scanner Guides.
Key information
Collected here so you can check it with the unit in front of you.
Related resources
| Resource | What it is | Where |
|---|---|---|
| Pocket2 product page | The published specifications | Vendor page |
| Pocket2 downloads and resources | Manifold's maintained page for the current Pocket2 User Manual and related software. The manual covers operating the scanner and the field app, and doubles as the getting-started material | Downloads page |
| MindCloud Studio | Desktop processing and format conversion — Windows, and Linux as an AppImage. The same page carries its user manual | Download page |
| MindCloud Go | Field app — preview and device control | App Store · Google Play |
| Manifold Tech support | After-sales support, and a contact form | Contact & support |
MindCloud Studio requires a per-machine licence. Request one from Manifold at contact@3dmanifold.com, or contact us if you bought the scanner through Weston Robot.
Electrical interfaces
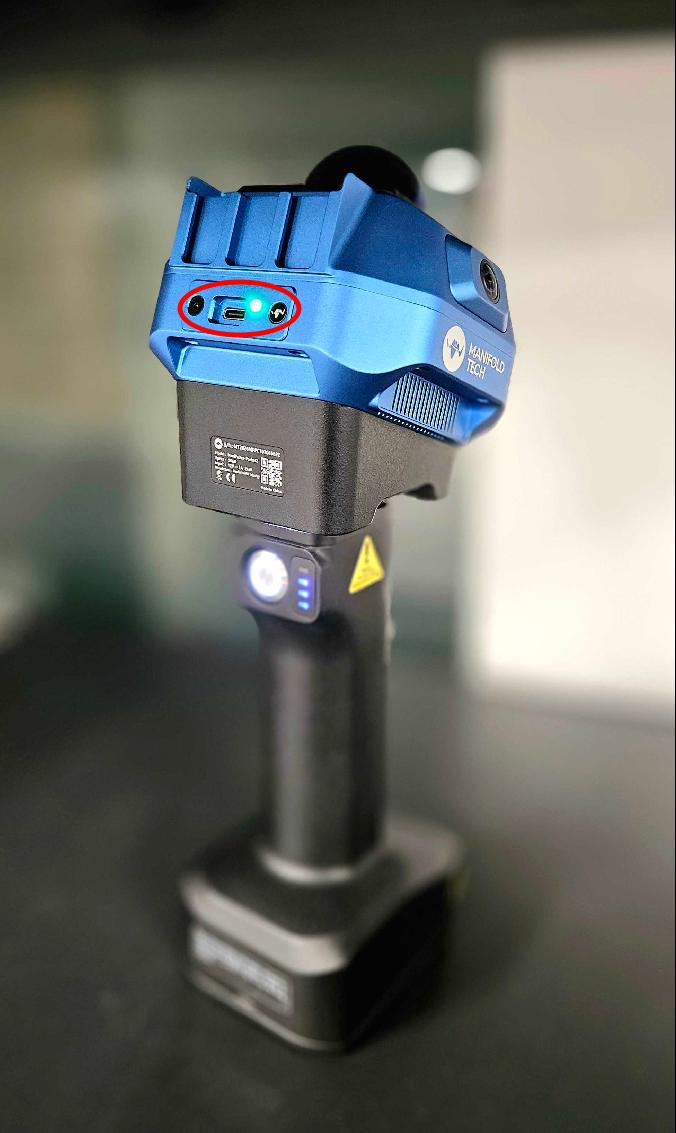
The scanner has two USB-C ports, one on each face. Either will copy a capture to a computer; only the rear Port C also takes accessories and charges the unit.
Rear
| Feature | What it is for |
|---|---|
| Port C (USB-C) | The multi-purpose port: accessories, data and charging. The RTK receiver and the detail camera plug in here, the RTK bracket seats in the hot shoe beside it at the same time, and it will also copy a capture to a computer — the connection these guides illustrate |
| Hot shoe | Holds an accessory bracket — the RTK extension slides in and is secured with its knob |
| Power and battery indicators | The power button and the four battery LEDs, on the handle battery. Hold three seconds to switch on or off, press once to check the charge. The LEDs report the level in 25 % steps; all four blinking blue is an over-temperature warning, not a charge state |
Front
The front carries a separate DATA port (USB-C), also for copying a capture to a computer. Either connector works; the guides use Port C on the rear, which is the one photographed above. Whichever you use, the scanner has to be powered on first and the cable has to be a USB 3.0 data cable rather than a charge-only one.
Elsewhere on the unit
| Feature | Where | What it is for |
|---|---|---|
| Handle battery latch | Where the handle meets the scanner | Press both latch buttons together to seat or release the battery. The handle also carries the shutter button used by the detail camera |
This matters most on extended sessions. If the unit moves between hot and cold environments, wipe any condensation off the LiDAR and camera windows before scanning — water on a window is indistinguishable from a bad return.
Serial number
Connect MindCloud Go to the scanner and open the app's Home page. It reports the device model, serial number, firmware version and app version — which is the full set support asks for, in one place.
Specifications
The figures Manifold Tech publish on the Pocket2 product page.
| LiDAR | 40 channels, 905 nm |
| Range | Up to 40 m at 10 % reflectivity · 70 m at 80 % reflectivity |
| Point rate | 200,000 points/s |
| Point cloud accuracy | Better than 1 cm |
| Global positioning accuracy | Better than 5 cm, typically around 3 cm |
| Cameras | 3 × 2 MP global-shutter RGB |
| Storage | Internal SSD — 256 GB, 512 GB or 1 TB |
| Data interface | USB 3.0 |
| Battery life | Up to 2 hours on a full 4000 mAh handle battery |
| Dimensions | 114 × 114 × 118 mm |
| Weight | 747 g scanner · 490 g handle battery |
| Operating temperature | −10 °C to 40 °C |
Field of view, ingress protection and the contents of the shipping case are not published by Manifold Tech, so they are not stated here — ask us and we will confirm against the unit and the delivery paperwork.
The two range figures are the same sensor against different surfaces. Dark, matte or wet materials sit near the 10 % end and will fall short of 40 m; bright painted walls and signage sit near the 80 % end. Plan around the lower figure for outdoor and industrial sites rather than the headline one.
Common configurations
Three accessories change what a session records. Each is documented in full in the Pocket2 User Manual, on Manifold's downloads page.
RTK, for scans that need real-world coordinates. The receiver plugs into Port C on the rear and its bracket slides into the hot shoe above it; tighten the securing knob before use. In MindCloud Go, Enable NTRIP appears on the New Project screen, with a satellite icon beside it for the settings — enter the credentials your CORS provider gave you and enable it; Ntrip connected in the bottom left means the configuration took. During the scan, a green RTK fixed solution in the status bar is what good signal looks like. Without RTK the Home page's Satellite indicator stays grey, which is normal rather than a fault.
The detail camera, for photographs tied to a position in the cloud. It plugs into Port C on the rear. Once a scan is running, the camera icon in the bottom left of the scanning view gives a live preview, and the shutter button on the handle battery takes the photograph; the app then asks whether to keep it.
The panoramic camera, for on-site context. An Insta X5 on an overhead bracket, joined to the scanner by two USB-C connections and three screws. Panorama Annotation is a toggle on the New Project screen and cannot be turned on once a scan is running — so it is decided before you start, not halfway round a site. With it on, the panoramic camera shoots in step with the point cloud, and annotations you add to a panorama — text, audio or video — are mapped back onto the position in the cloud where they were taken.
Guides for this product
| Guide | What it covers | Reach for it when |
|---|---|---|
| Manifold Scanner Guides | The whole path: preparing the scanner, connecting MindCloud Go, capturing, processing and exporting a .pcd | You are about to scan a site, or have a scan and need it in a usable format |
| Pocket2 Connection Guide | The scanner's Wi-Fi, what the app talks to, and what to do when it will not connect | The app cannot see the scanner |
| Pocket2 Scanning Guide | Initialisation, how to walk a site, stopping safely | Your first session, or a capture came back with gaps |
| Point Cloud Processing & Export Guide | MindCloud Studio: loading the .lx, Spatial subsampling at 0.1 m, exporting a .pcd | You have a raw capture and need a point cloud for the toolbox |
All Pocket2 guides — generated from the pocket2 tag, so anything published later appears there without this page being edited.
Solutions for this platform
A scan from this unit is what the Robot Deployment Toolbox authors a site map against. The handoff is a single file: subsample to 0.1 m and export a .pcd from MindCloud Studio, then load it in the toolbox's Load stage — see the Point Cloud Processing & Export Guide.
Troubleshooting & FAQ
The app cannot find the scanner's Wi-Fi
Restart the scanner and search again, ideally from a different phone and in a different spot — a location with many competing Wi-Fi sources is a known cause. The Pocket2 Connection Guide has the full sequence and the phone settings that interfere with it.
Coverage is patchy on dark surfaces
Expected — see the note under Specifications. Dark and matte materials return far less light, so effective range drops well below the headline figure. Work closer to them.
The computer does not see the SSD over USB
Three things, in order: the scanner has to be powered on before you connect it — it is not a passive drive; the cable has to be a USB 3.0 data cable rather than a charge-only one; and both ends need to be fully seated. Use the supplied cable. Electrical interfaces describes both ports.
How far can the phone be from the scanner?
Far enough is not a distance — the link is Wi-Fi, and the volume of preview data it carries makes it sensitive to interference. Mount the phone on the scanner with a holder, which also removes the risk of walking away from a scan in progress.
Does the scan survive the phone dying?
Yes. Scanning runs on the scanner, so the capture continues if the app is closed or the phone shuts down. Rejoin the scanner's Wi-Fi with the same phone — restarting MindCloud Go if you need to — and the app returns to the running session; the project is only committed once you stop it and the app reports it saved. The Pocket2 Scanning Guide covers what that means in practice.
Support
Collect the serial number, firmware version and app version — all three are on MindCloud Go's Home page — before raising a ticket. Before you contact us lists what helps.