A2
Unitree's A2 quadruped, supplied as a development platform. Unitree's control stack handles locomotion; you write your application against it over the robot's internal network, wired for anything touching low-level control.
This page covers the standard, legged A2 — the variant we supply and have verified against a physical unit. The wheel-leg A2-W is a physically distinct product (16 DOF vs 12, different mass and dimensions) and cannot be field-converted to or from the legged A2. Most of the SDK and network information below still applies to A2-W, but check any dimension, mass or joint figure against Unitree's own documentation for the variant you have — they differ.
This page does not repeat or replace Unitree's documentation. It highlights the information you reach for most often, and supplements it with what we have learned from supplying and supporting these units — configuration, verified values, and our own guides.
Unitree's own documentation:
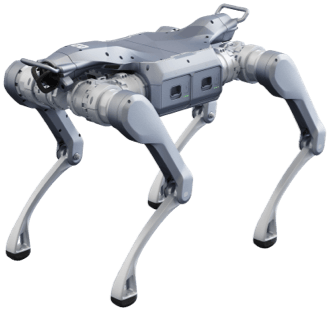
Everything below is verified against a physical unit, except the serial number location, marked TODO.
Getting started
Read Operational Safety before powering the robot for the first time, including the additional hazards specific to quadrupeds. The A2 is a legged robot that can fall, and the guidance there on keeping clear of the leg envelope prevents the most common injuries and damage.
Bring-up in outline:
- Power on and pair the controller or the mobile app — same button sequence as Go2 and B2: short press, then a ~2 s long press until the LEDs illuminate and you hear a chime.
- Connect your machine to the robot's internal network over Ethernet, via the PC1 Switch Ethernet port — see Network layout.
- SSH to the user development computer (PC2) — see Logins and IP addresses.
- Install the SDK and run one of Unitree's examples to confirm the chain works.
Key information
A quick reference for the things you reach for most often, collected so you can find them with the robot in front of you. Values are as configured on the units we supply.
Related resources
Files and repositories you clone or download to work with the robot.
| Resource | What it is | Where |
|---|---|---|
| User manual | Unitree's A2 user manual | A2 user manual |
| SDK development guide | Unitree's A2 SDK documentation | A2 SDK Development Guide |
| C++ SDK | Primary development interface (same repo as Go2/B2) | unitree_sdk2 |
| Python SDK | Python bindings for the same interface | unitree_sdk2_python |
| ROS 2 package | ROS 2 integration | unitree_ros2 |
| URDF / CAD | Robot model for simulation and mechanical design — not in unitree_model, lives in unitree_ros for this platform | unitree_ros — a2_description |
Installing Weston Robot packages on the robot or your host? Add our package repository first: Weston Robot Apt Source.
Vendor manuals, videos and the mobile app are on the official pages linked at the top of this page.
Serial number
TODO — where the serial number and model designation are found on this platform.
Logins and IP addresses
A2 ships with two independent onboard computers on two private networks.
| Computer | Address | Credentials | What it is |
|---|---|---|---|
| User Development Unit (PC2) | 192.168.123.162 (also 192.168.124.162) | unitree / Unitree0408 (older firmware) or Unitree#24226 (newer firmware) | Where your code runs |
| Motion Control Unit (PC1) | 192.168.123.161 | — | Real-time motion control. Not user-accessible — locked by Unitree, updates via OTA |
Use a wired connection for anything touching low-level control — WiFi dropouts can stall a control loop and drop the robot. WiFi is reasonable for high-level work and for internet access.
Network layout
Connect to the PC1 Switch Ethernet port (labelled Ethernet 1 below) — a single cable puts you on the same subnet as both onboard computers.
Redrawn (network path only) from Unitree's official About A2 — Internal Devices page, which also documents the multimedia and passthrough-chip internals not shown here.
A second, .124.x network carries LiDAR point-cloud traffic between PC2 and the onboard LiDAR units. It's preconfigured — SDK development on it is not supported; use the .123.x network above instead.
Electrical interfaces
Two separate places to look for connectors, matching Unitree's own documentation: the A2 body itself (side panels) and the docking station built around PC2.
On the A2 body (side panels):
| Group | What's there |
|---|---|
| Leg power connectors (FL/FR/RL/RR) | Internal leg power/RS-485 wiring — not for general payload use |
| PC1 / PC2 USB break-outs | Type-C access to both onboard computers without opening the body |
| Switch 1 / Switch 2 network ports | The same ports as Ethernet 1/2 in Network layout above |
| Regulated power outputs | 24V, 12V and battery-voltage outputs via CAN/RS-485 connectors, for powering external payloads |
Outputs on the same voltage rail share one supply, not an independent budget per port. Check Unitree's official specification before sizing payload wiring near the limit.
On the docking station (PC2):
| Group | What's there |
|---|---|
| CAN / RS-485 waterproof ports | Power pass-through from the A2's own battery, plus external CAN/RS-485 for payload use |
| USB Type-C ports | Three ports; one supports USB-PD for higher-power devices |
| Network ports | Same 192.168.123.x / 192.168.124.x subnets as the body — one port passes through to the A2 main unit and supplies no power itself |
| SIM card slot | NanoSIM, for the internal 4G module |
One Type-C port on the docking station is not open to customer use. All ports here trip on overcurrent and need a manual restart to recover — not a self-clearing fault.
For exact port numbers, pin assignments and full specifications, see Unitree's official A2 SDK Development Guide.
What we supply
We supply the standard, legged A2 — not A2-W, A2-Pro or A2-W-Pro. For dimensions, mass, joint limits and ratings, use Unitree's documentation linked at the top of this page: those figures are theirs and they revise them.
TODO — anything else that differs from a unit bought direct from Unitree (accessories, custom configuration).
Troubleshooting & FAQ
Does the remote control interfere with my own SDK program?
Yes — the remote stays active and additive while your high-level SDK program is running; both command streams are executed simultaneously. It is only suppressed once you release motion-switcher mode for low-level control. Keep this in mind if the robot behaves unexpectedly during development.
Should I disable auto-recovery when carrying a payload?
Yes. Auto-recovery flips the robot upright if it falls, which can damage head-mounted equipment (camera, LiDAR) if a payload is fitted. Disable it in the SDK before mounting a payload, and recover manually with the remote if the robot falls.
Questions that apply across our platforms
These are answered in the guides rather than repeated on every product page:
- Is the robot waterproof? — and what the ratings mean across platforms
- How often do I need to lubricate the joints? — and what to do about stiffness or play
- The robot has fallen over and does not respond to the controller — the recovery sequence
Support
Collect the serial number, firmware version and logs before raising a ticket — Before you contact us lists what helps and includes the commands to gather it.